
The music industry is racing towards streamed distribution, but many of us have built up sizeable music collections. I certainly have, and I spent weeks ripping my old CD library a few years back (and then repeated the job when I realized that 128Kbps MP3s weren’t going to cut it). And if you prefer to own your music, versus renting it in perpetuity via a streaming service, you’re likely still either buying (and ripping) CDs or purchasing digital downloads.
But like your neighbor’s well-kept garden, the secret to a strong music library is regular maintenance. Untagged or unnamed tracks, missing artwork, duplicate files, music scattered across a swathe of folders and devices—these are the “weeds” that must be found and uprooted before your collection goes to seed.
If your music library is devolving into an audio jungle, there’s no better time to wrestle back control. I’ll walk through some simple jobs and handy tools that’ll keep your collection in good order and help you save valuable storage space. I have tips for both PC and Mac users.
- Reorganize your music folder structure
- Identify and relabel unnamed files
- Update music metatags
- De-duplicate your music library
- Upgrade and find missing cover art
- Reorganize your music folder structure
- Managing compilation albums and various artists
- Identify and relabel unnamed music files
- Update your music’s metatags
- De-duplicate your music library
Reorganize your music folder structure
Before you get hands on with your audio files, you should do a little thinking. A clear and simple music folder structure makes library management far easier. Time spent reorganizing your files and folders now will be repeatedly paid back over the coming years.
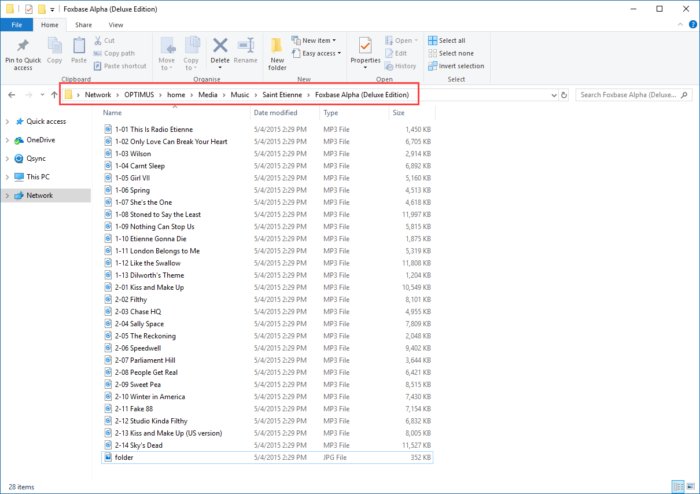
I recommend creating a top-level Music folder in your Windows media library, with sub-folders for each Artist in the collection. In each artist folder, create sub-folders for each release. Each release folder includes the audio tracks and cover artwork (named folder.jpg which is the standard nomenclature, ensuring artwork appears in your favorite media players).
In terms of hierarchy, a simple Music library structure looks like the following:
Music > Artist > Release Name> Audio & Artwork Files
 Terry Shaw/TechHive
If you’re a true audio enthusiast, you likely prefer lossless audio tracks (FLAC, ALAC, DSD files) to “lossy” MP3s. But it’s even more likely that your collection includes both types of files. In this scenario, you might prefer to split your folders accordingly, with (for example) MP3 and Lossless sub-folders tucked under the top-level Music folder.
This configuration requires you to run separate Artist and Release folder trees in the lower levels of the hierarchy, but it does allow you to restrict apps to specific file types. Say, for example, you want your Sonos speakers to only stream lossless audio. You simply point the controller app to the Lossless sub-folder, rather than the top-level of your Music library.
In this case, your folder structure looks more like this:
Music > Lossless > Artist > Release > Tracks & Artwork
and
Music > MP3 > Artist > Release > Tracks & Artwork
Obviously, if you have both Lossless and MP3 versions of your tracks stored in your folders, there’s always the possibility of duplication in your favorite media apps. We’ll look at de-duplication later; but if, like me, you prefer to store tracks in multiple formats, this is something you’ll need to manage for each music player.
Managing compilation albums and various artists
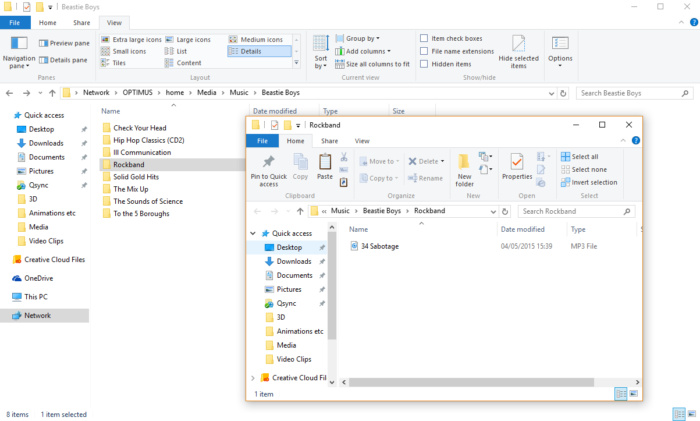
One area of music management that’s caused me considerable pain is cataloging compilation albums of tracks featuring various artists. Nowadays, I hold these albums in a Various Artists folder in my media library, with sub-folders for each release. Be very careful, however, if you try an automated library management application. It might well decide to move individual tracks out of the compilation album folder (i.e. Various Artists > Compilation Album Name) and relocate them individually to Artist folders (i.e. Some Artist > Compilation Album Name > Individual Track). That explodes your compilations across your media library. With a misplaced click, you end up with a host of identically named compilation sub-folders appearing in multiple artist folders, each with just one or two tracks.
This kind of issue can be time-consuming to resolve if you own many compilations. So take a backup before you use any app that promises to magically scan your PC and collate your music library on your behalf.
 Terry Shaw/TechHive
Identify and relabel unnamed music files
Once you have clarity on your folder structure, you can begin the work to reorganize your library. But before you go crazy with our old friends CTRL + X and CTRL + V, there are smarter ways to move your files than simple copy and paste.
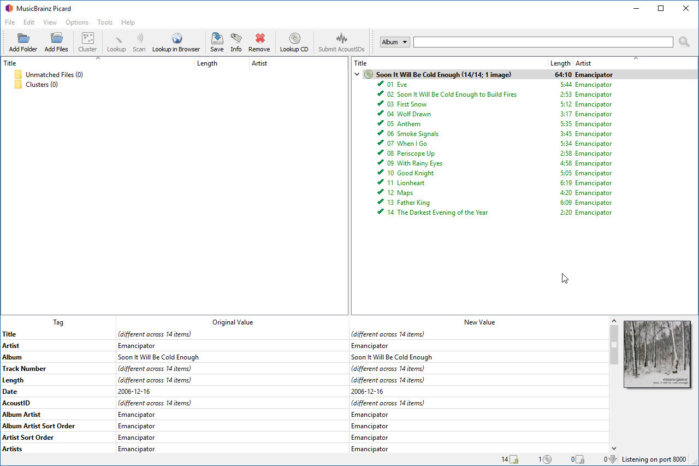
In a previous guide, How to master your music metadata (Parts 1 & 2), I discuss how you can use a free application such as MusicBrainz Picard (available for Mac OS, Windows and Linux) to identify tracks using an “audio fingerprint” and retrieve metadata for those files from a comprehensive online database. Picard is also equipped to automatically rename those files, based on a structure you define, and it will even move those files to an appropriate location in your music library. Picard is a must-have tool for any music collector.
 Terry Shaw/TechHive
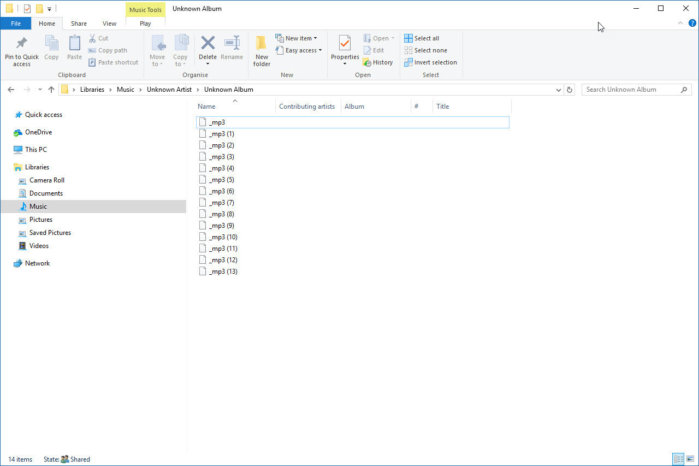
An important step in cleaning up your music library is eradicating all of those “Unknown Track” by “Unnamed Artist” files. MusicBrainz Picard is most definitely the tool to use for that.
 Terry Shaw/TechHive
If you’re seeking greater control over your file-name edits—perhaps they only need a tweak, rather than wholesale reinvention—don’t waste time editing tracks manually. There are alternatives for both Mac OS and Windows that are well worth exploring.
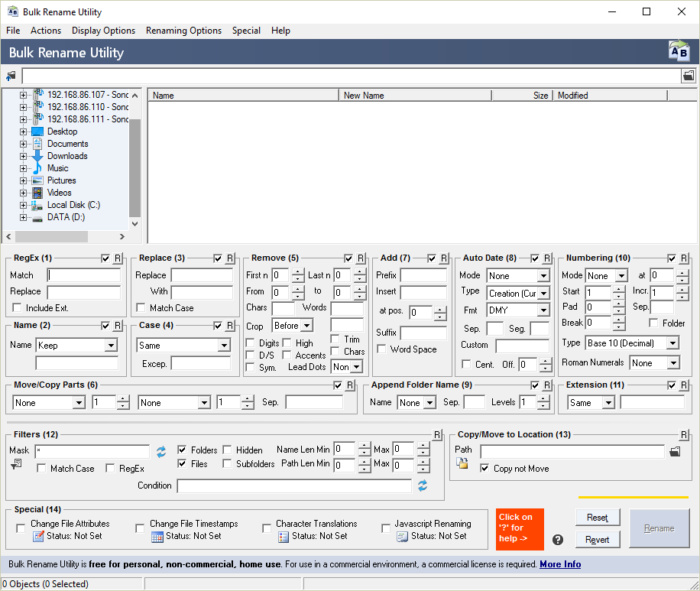
On Windows, I recommend the excellent Bulk Rename Utility, which is available as a free download. As its name suggests, the app allows you to easily rename files and folders in bulk, based upon a wide selection of inputs. It’s very simple to rename multiple files with inserted text, replace numbers, convert text cases, automatically add numbers, and more. Handily, you can also set your criteria for renaming multiple files and preview the results before the changes go live.
I must admit; the app’s user interface looks extremely complicated at first. But using Bulk Rename Utility is not as scary as it looks, I promise!
 Terry Shaw/TechHive
At the top left of the app window, you’ll see a folder tree that allows you to navigate to the folder containing the files whose names you wish to change. Underneath, there are a swathe of panels and controls, each of which pertains to a renaming method. They include:
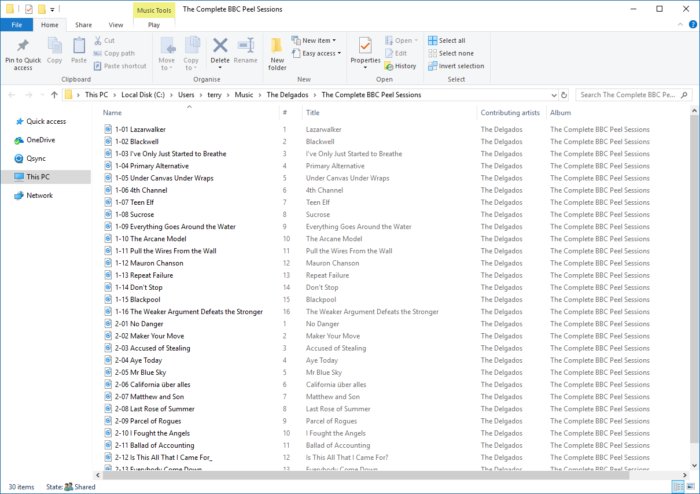
As an example, let’s take a folder from my music library: The Complete BBC Sessions by The Delgados. The tracks are neatly held in the appropriate artist and album sub-folders, but I noticed an issue: The filenames only include the disc number, track number, and track name (e.g. 1-02 Blackwell.mp3).
 Terry Shaw/TechHive
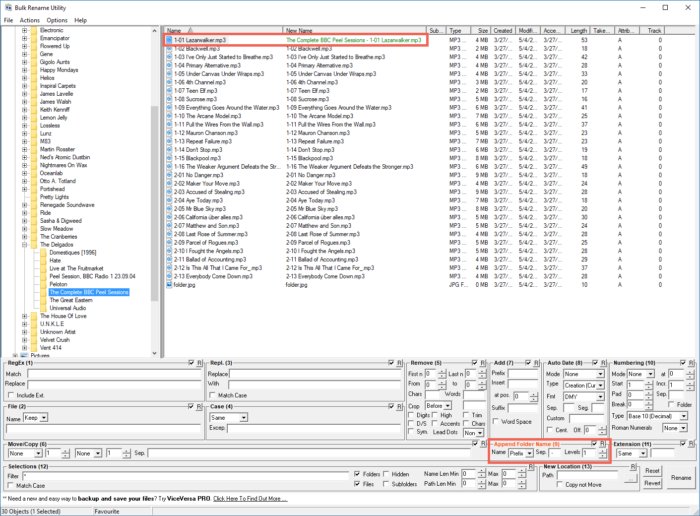
What if I wanted to append the album name to the file name, or the artist name? Sure, I could use File Explorer to manually edit all 29 files, which would take some time.
Instead, I navigate to the folder in Bulk Rename Utility and head to the Append Folder Name panel. A dropdown menu allows me to select whether to append the folder name as a prefix or suffix. I choose a separator character and choose the number of levels in the hierarchy to include. One level will append the album name and, as the album folder is nestling in its respective artist folder, I can choose to include two levels to add both artist and album names.
With the criteria set, all I do to preview the change is click on one or more files in the main pane. Once I’m happy, I hit Rename and the job’s done.
 Terry Shaw/TechHive
As you can see, the options are exhaustive, but Bulk Rename Utility allows you to experiment with ease and, importantly, preview potential changes before they’re locked in. It’s perfect if you decide you need sweeping changes in your file name structure. Like MusicBrainz Picard, Bulk Rename Utility is an essential tool for any digital music collector.
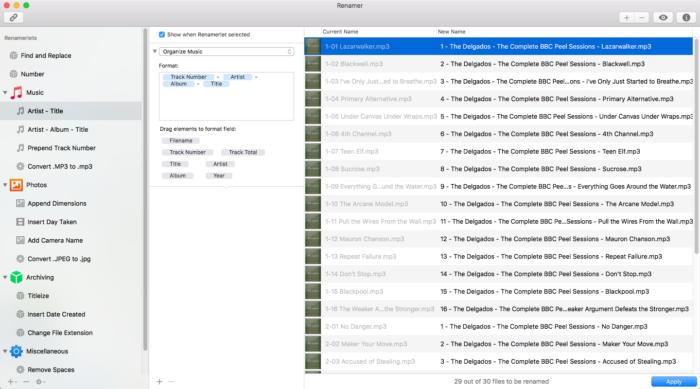
Similarly, Mac users can batch rename files in Finder, but if you want the same level of control that your PC-loving friends can experience with Bulk Rename Utility, then check out Renamer 5. It’s priced at $19.99, with a 15-day free trial.
Renamer 5 is actually easier to use than Bulk Rename Utility. It can automatically extract artist and album names from metatags, while a simple drag and drop panel allows to you reconfigure the file name structure with ease. Once again, you can preview changes on the fly and no changes are made until you hit Apply.
 Terry Shaw/TechHive
Update your music’s metatags
While you’re tidying up your files and folders with MusicBrainz Picard, there’s no better time to update the rest of your music library metadata. Picard isn’t completely automated, but with a little guidance, it can chew through chunky audio collections with ease.
Be sure to check out How to master your music metadata for a full walkthrough.
De-duplicate your music library
The final step of your audio cleanup is de-duplication. If you’ve been collecting music for some time, you might well find that you have duplicate copies of albums scattered around your folders.
Well, they might look like duplicates on the surface—with the same folder name, for example—but are they really duplicates? Perhaps you re-encoded an album at a different bit rate for mobile playback. Perhaps it’s that obscure Japanese edition of the album you once cherished. Perhaps it’s simply been mislabeled and it’s not a duplicate at all.
It’s clear we need to find a quick and easy way to identify both potential and real duplicates in our music library. With thousands of files to work through, we’re going to need a little help.
There are many file de-duplication apps on the market. The best offer multiple methods for detecting duplicate files. File name match is a given, but also look for advanced features, such as file size match, hash matches and even metadata matching that can be used to tease out those hidden duplicates.
One such option is Duplicate Cleaner. It specializes in hunting down all manner of duplicate files on your PC. It doesn’t just work with music, but also photos, movies, videos, Word documents, PowerPoint presentations, text files, and so on.
[Source”GSmerena”]